Rebuilding A Game Boy Pocket

For the last two years, I’ve been trying to fix broken consoles to give them a new lease of life. After I post a successful repair there’s always someone (Ian. It’s Ian.), who says I should remember to take photos and write about it. To placate those people (IAN), I’ve remembered to do just that this is all about repairing a broken Game Boy Pocket in order to bring it back to life and sell it on.
It’s at this point I want to stress that while this project might have been successful, it’s not always the case. My desk is currently hiding the shells of those who weren’t so lucky, and if you are going to get into console repairs, I urge you to be prepared for a lot of failures. Just to have the confidence to keep pushing yourself and you will get better.
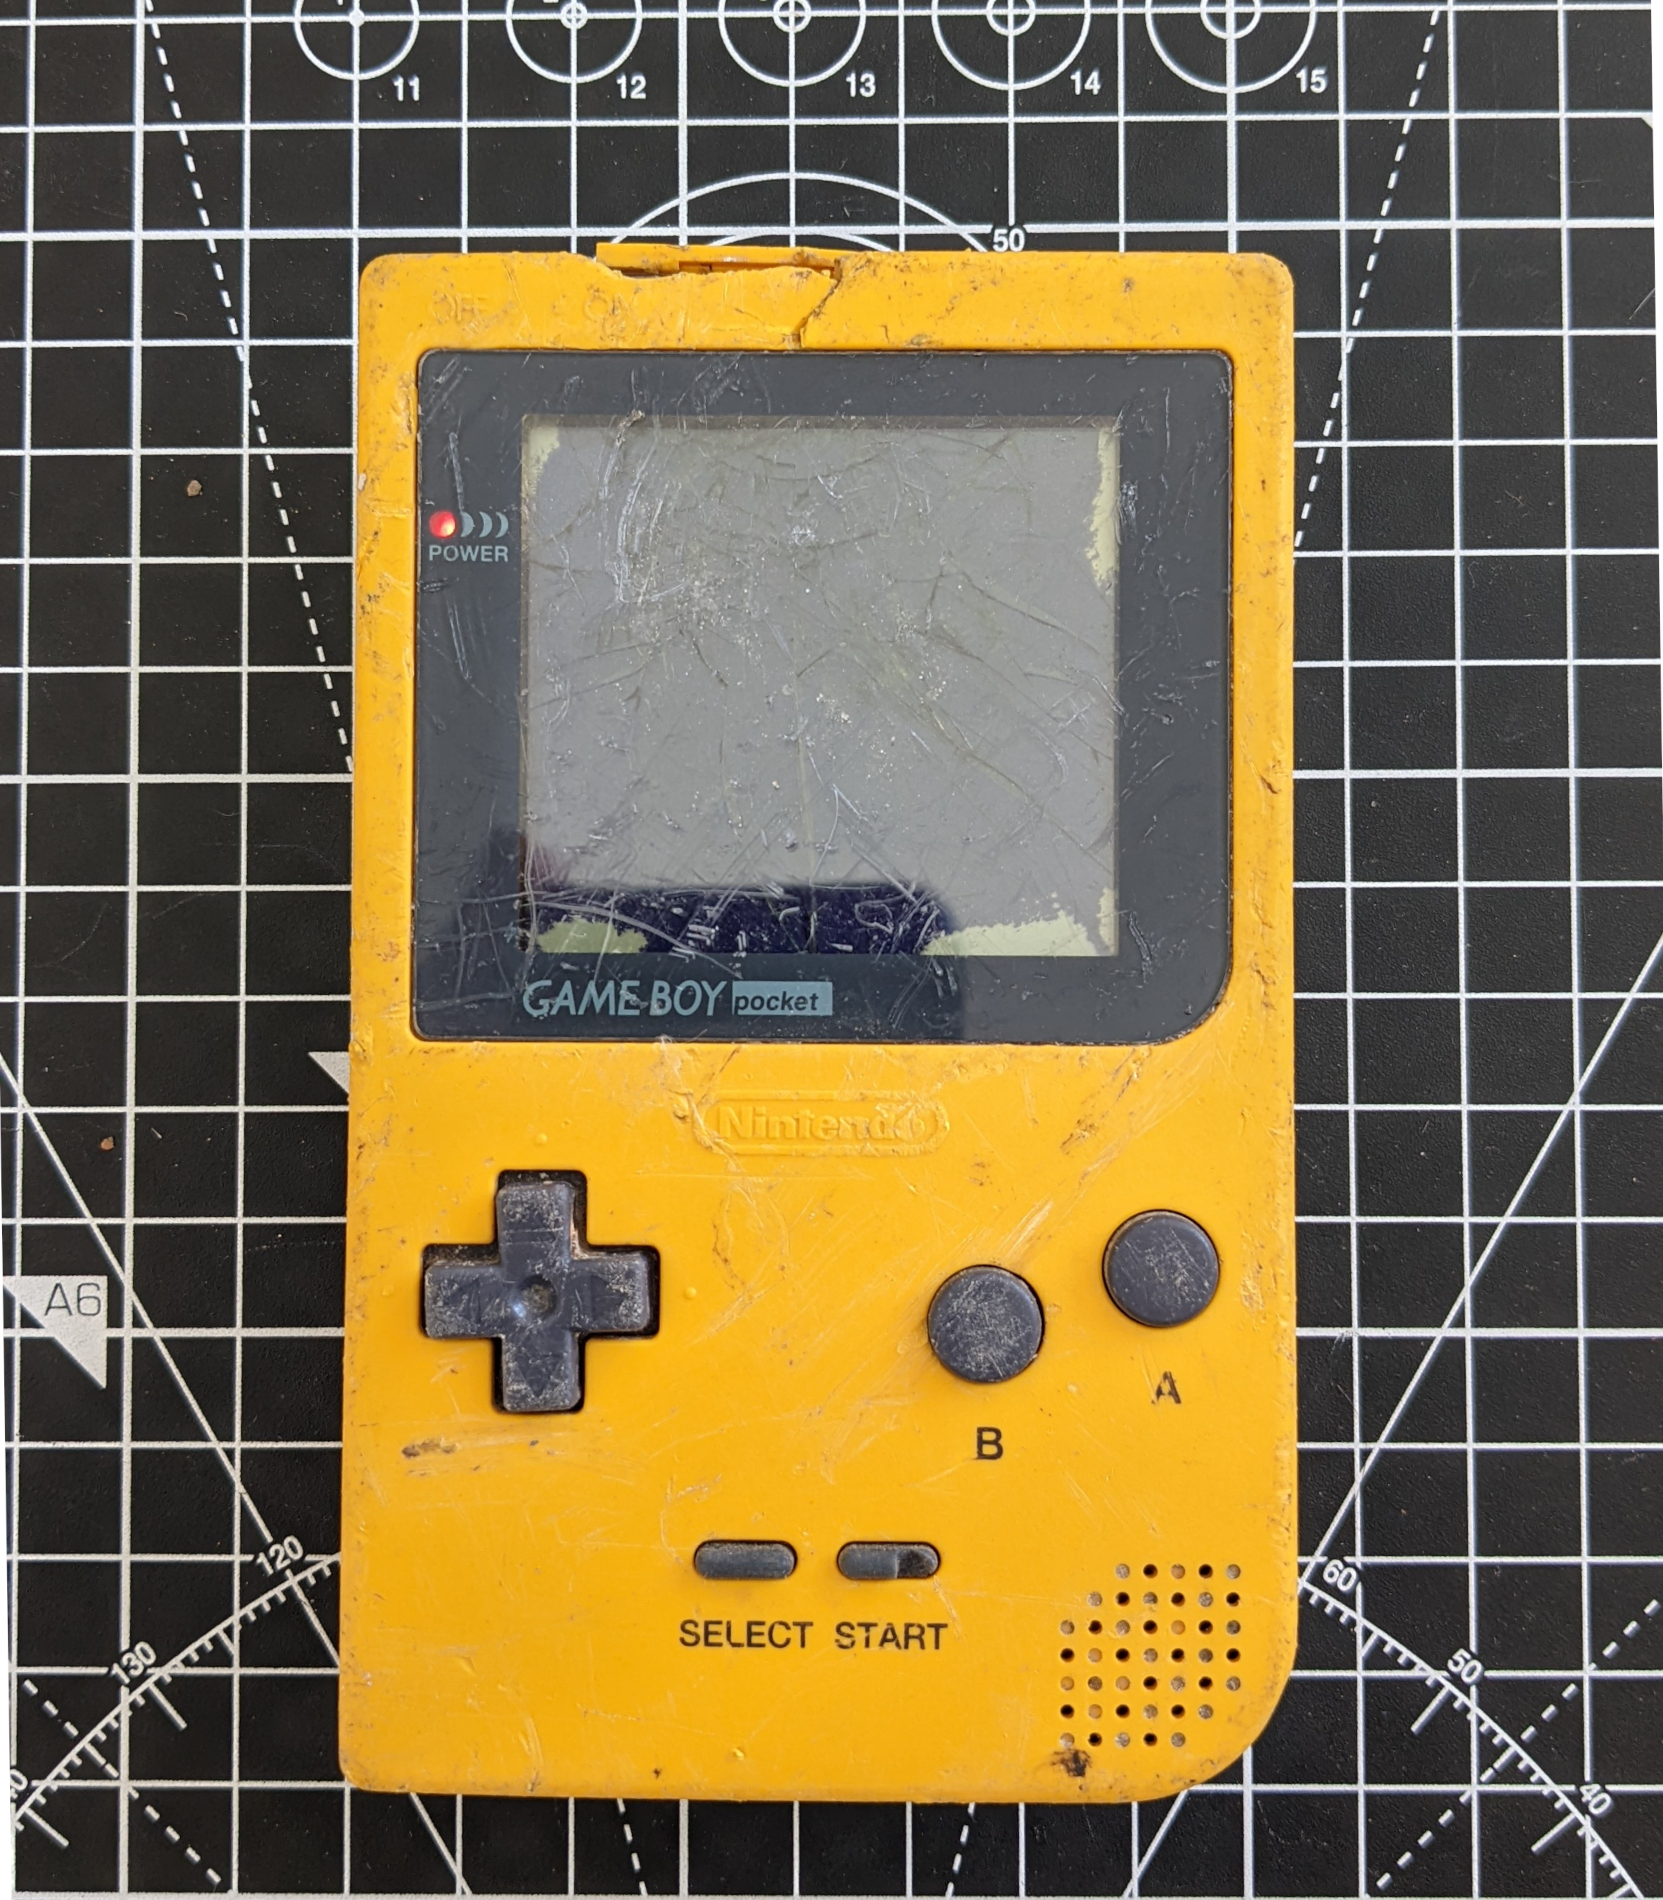
The Game Boy Pocket in question was bought from eBay last year and to give the seller credit, they were upfront about both the condition of the console and the list of problems it had – chiefly that it looked like a steamroller had repeatedly run over it.


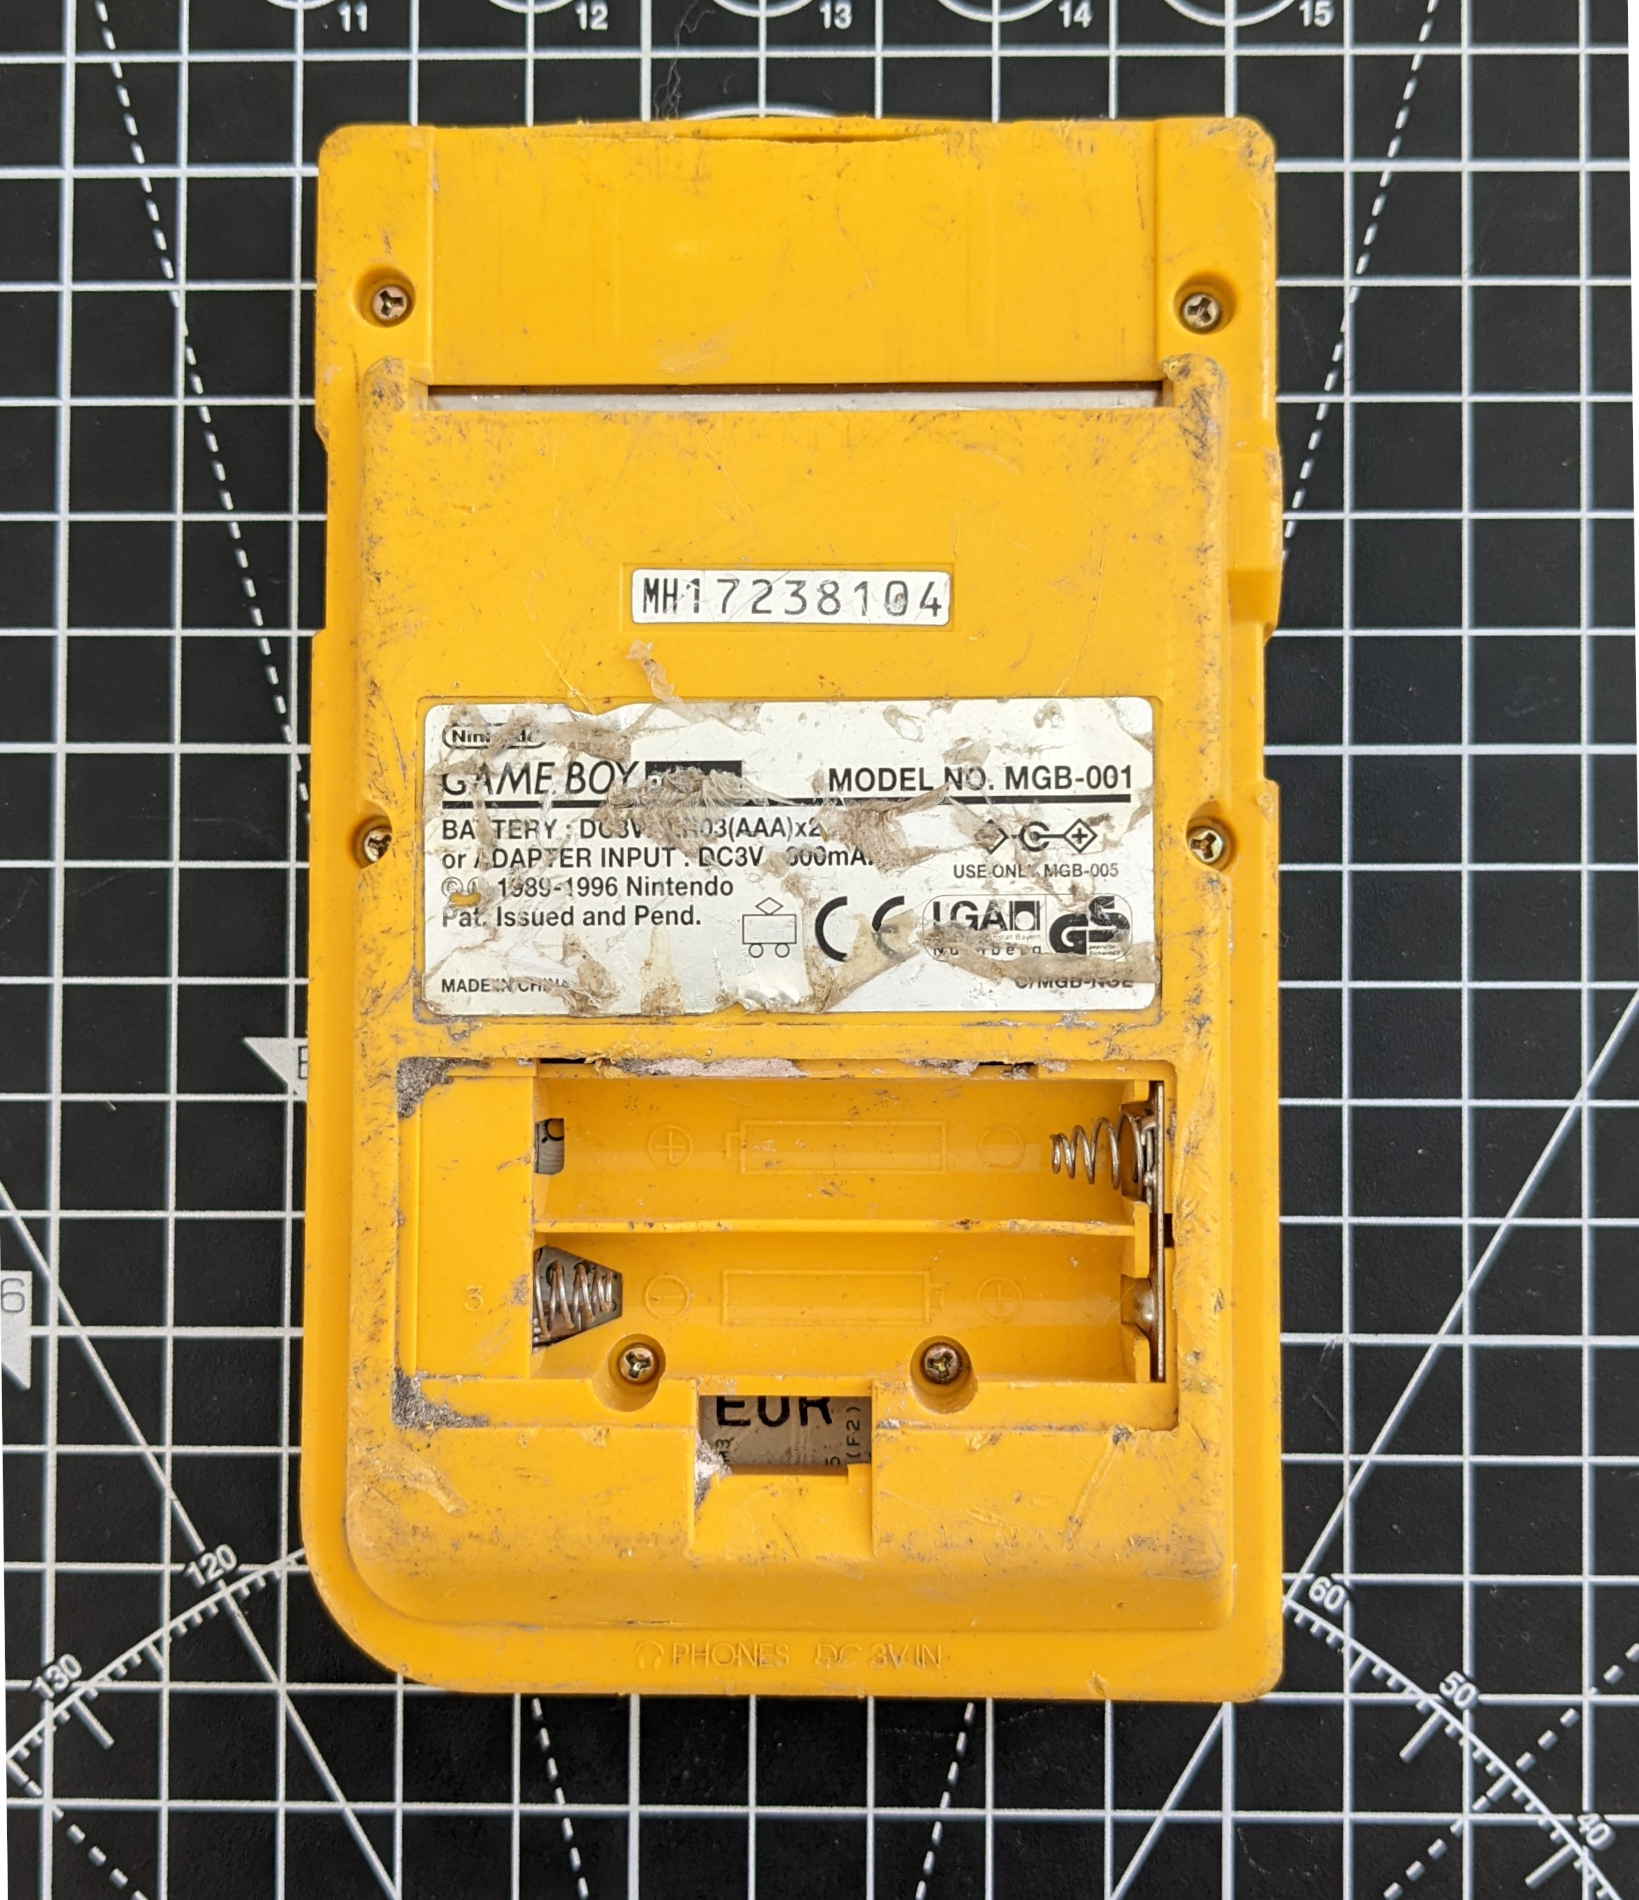
The screen looked like the floor of a pub toilet, with liquid everywhere, and instead of batteries, the back of the shell had what looked like concrete in it. It wasn’t all bad though, the seller did say that the little red LED did light up and he could hear that lovely ‘ba-ding’ sound when he turned it on so I decided to lay down some cash as I saw nothing but potential.
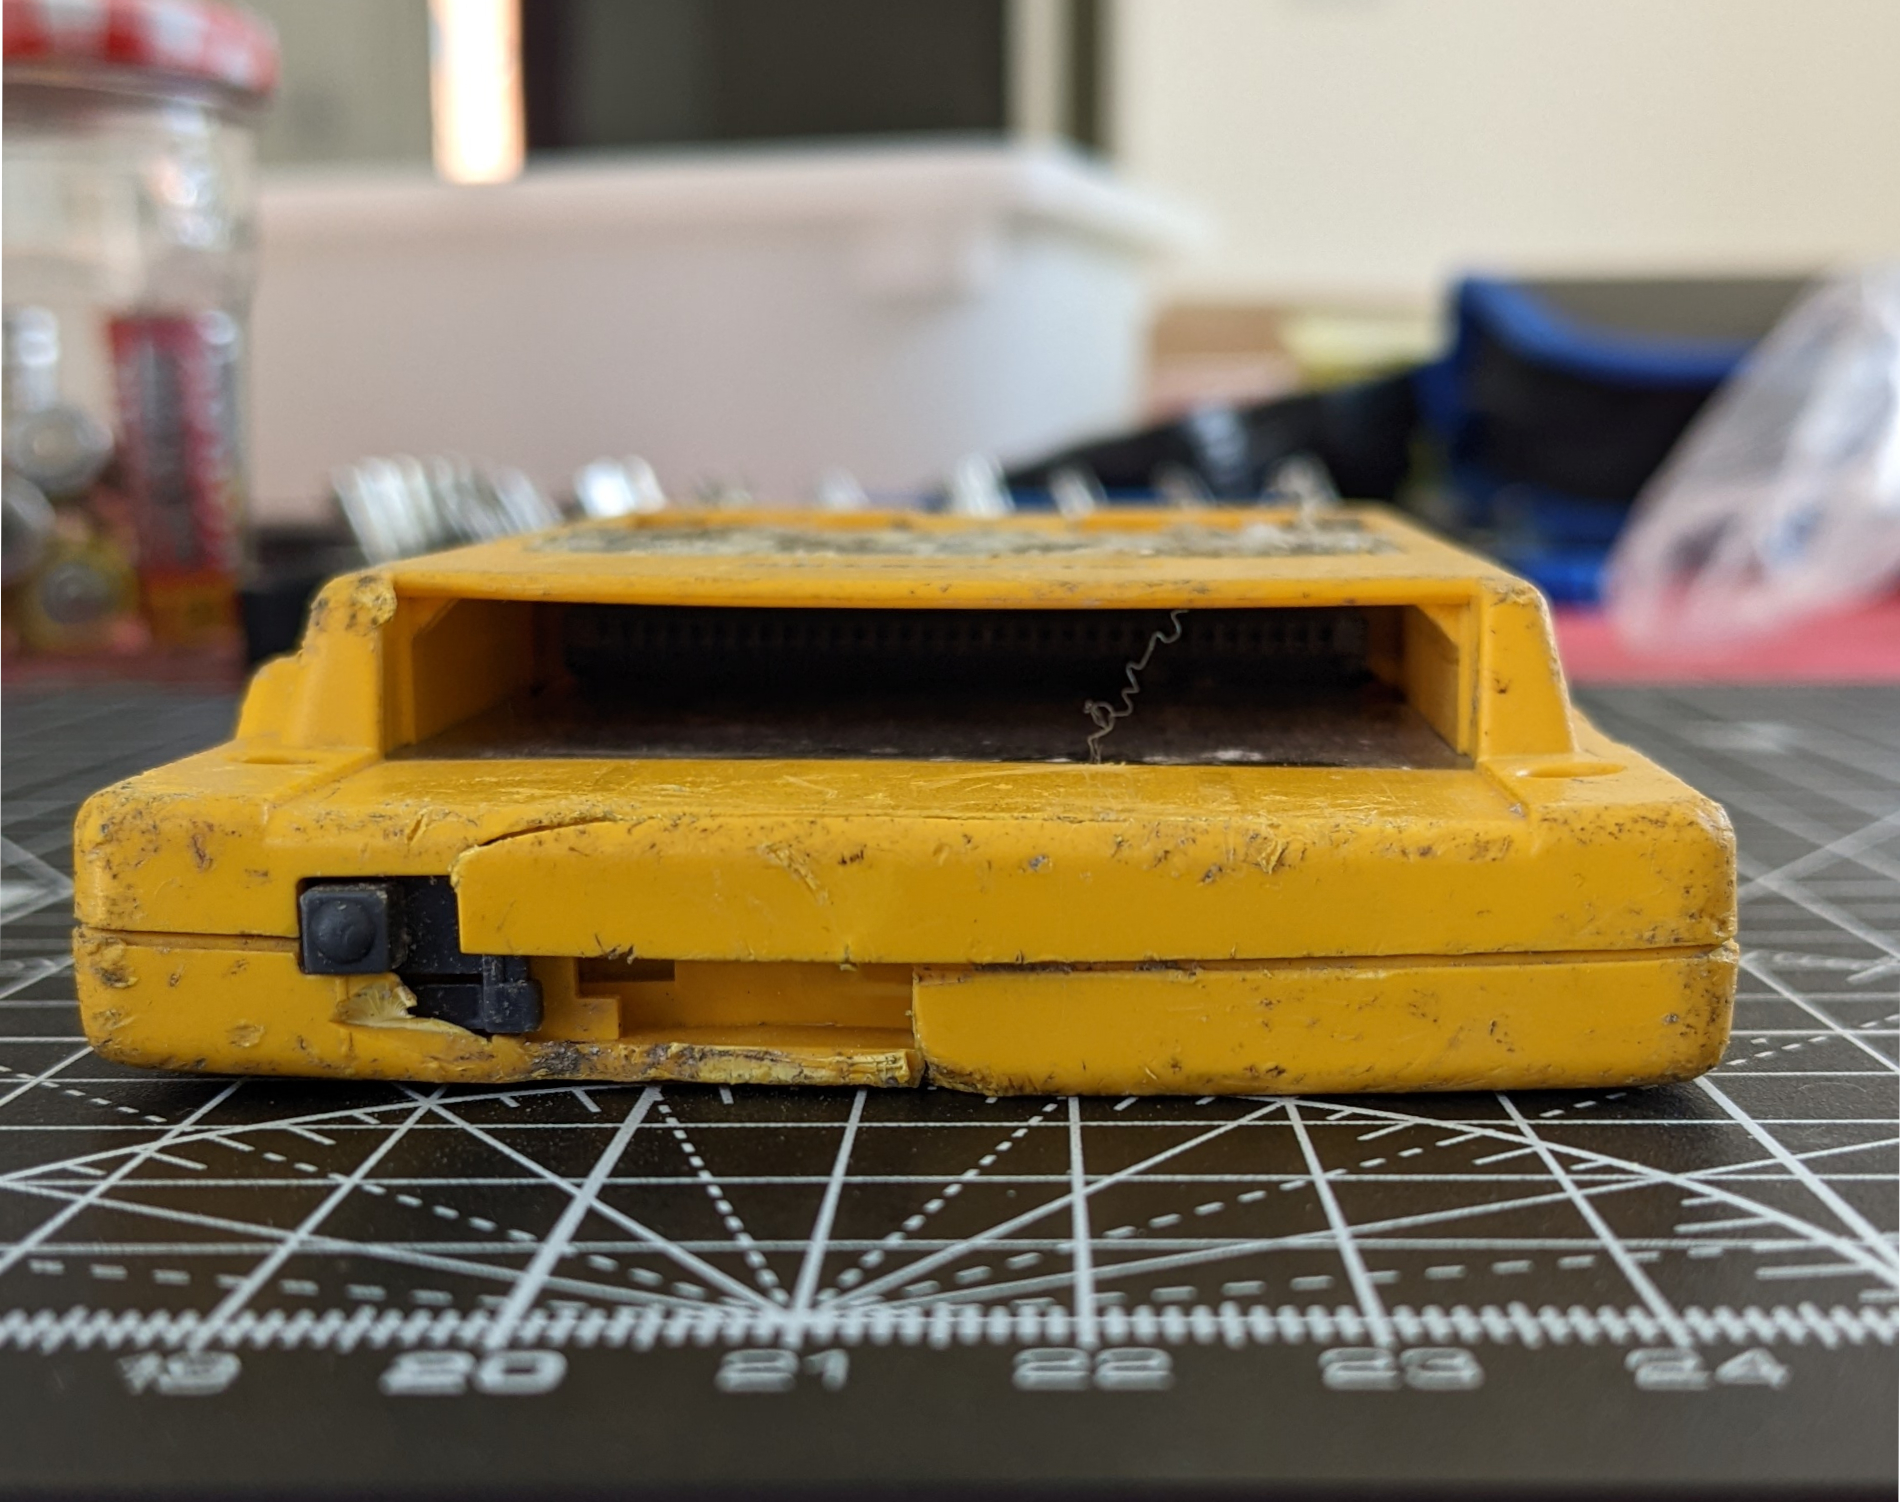
When the little yellow fella arrived, I gave the console a quick once over; the shell was indeed splintered, and the console had a faint whiff of ‘building site’ about it. There was a bit of grit in the battery compartment, but it did indeed power up. After clearing out an actual rock from the cartridge slot I loaded up the absolute banger of a game – WWF Superstars 2 – and was so excited to hear the opening bars of the game. Although I couldn’t see anything at all on the screen, it did mean that there was life left in the old Boy so it was time to hit the shops.
Shopping list
When repairing anything, I do like to salvage what I can. In this case, everything but the motherboard and speaker were useless and had to be binned. The screen was obliterated and the buttons were beyond usable, so this is what I determined would be needed.
- New shell
- Buttons and membranes
- IPS screen
- Power regulator (optional)
The build
Once all of the bits and pieces arrived, it was go time. The first thing I did was give the motherboard a deep clean using Isopropyl Alcohol (96%), a toothbrush and a cotton bud. This got out most of the grime and scuzz from the previous owner’s quarry and replaced it with that vodka smell I know all too well.
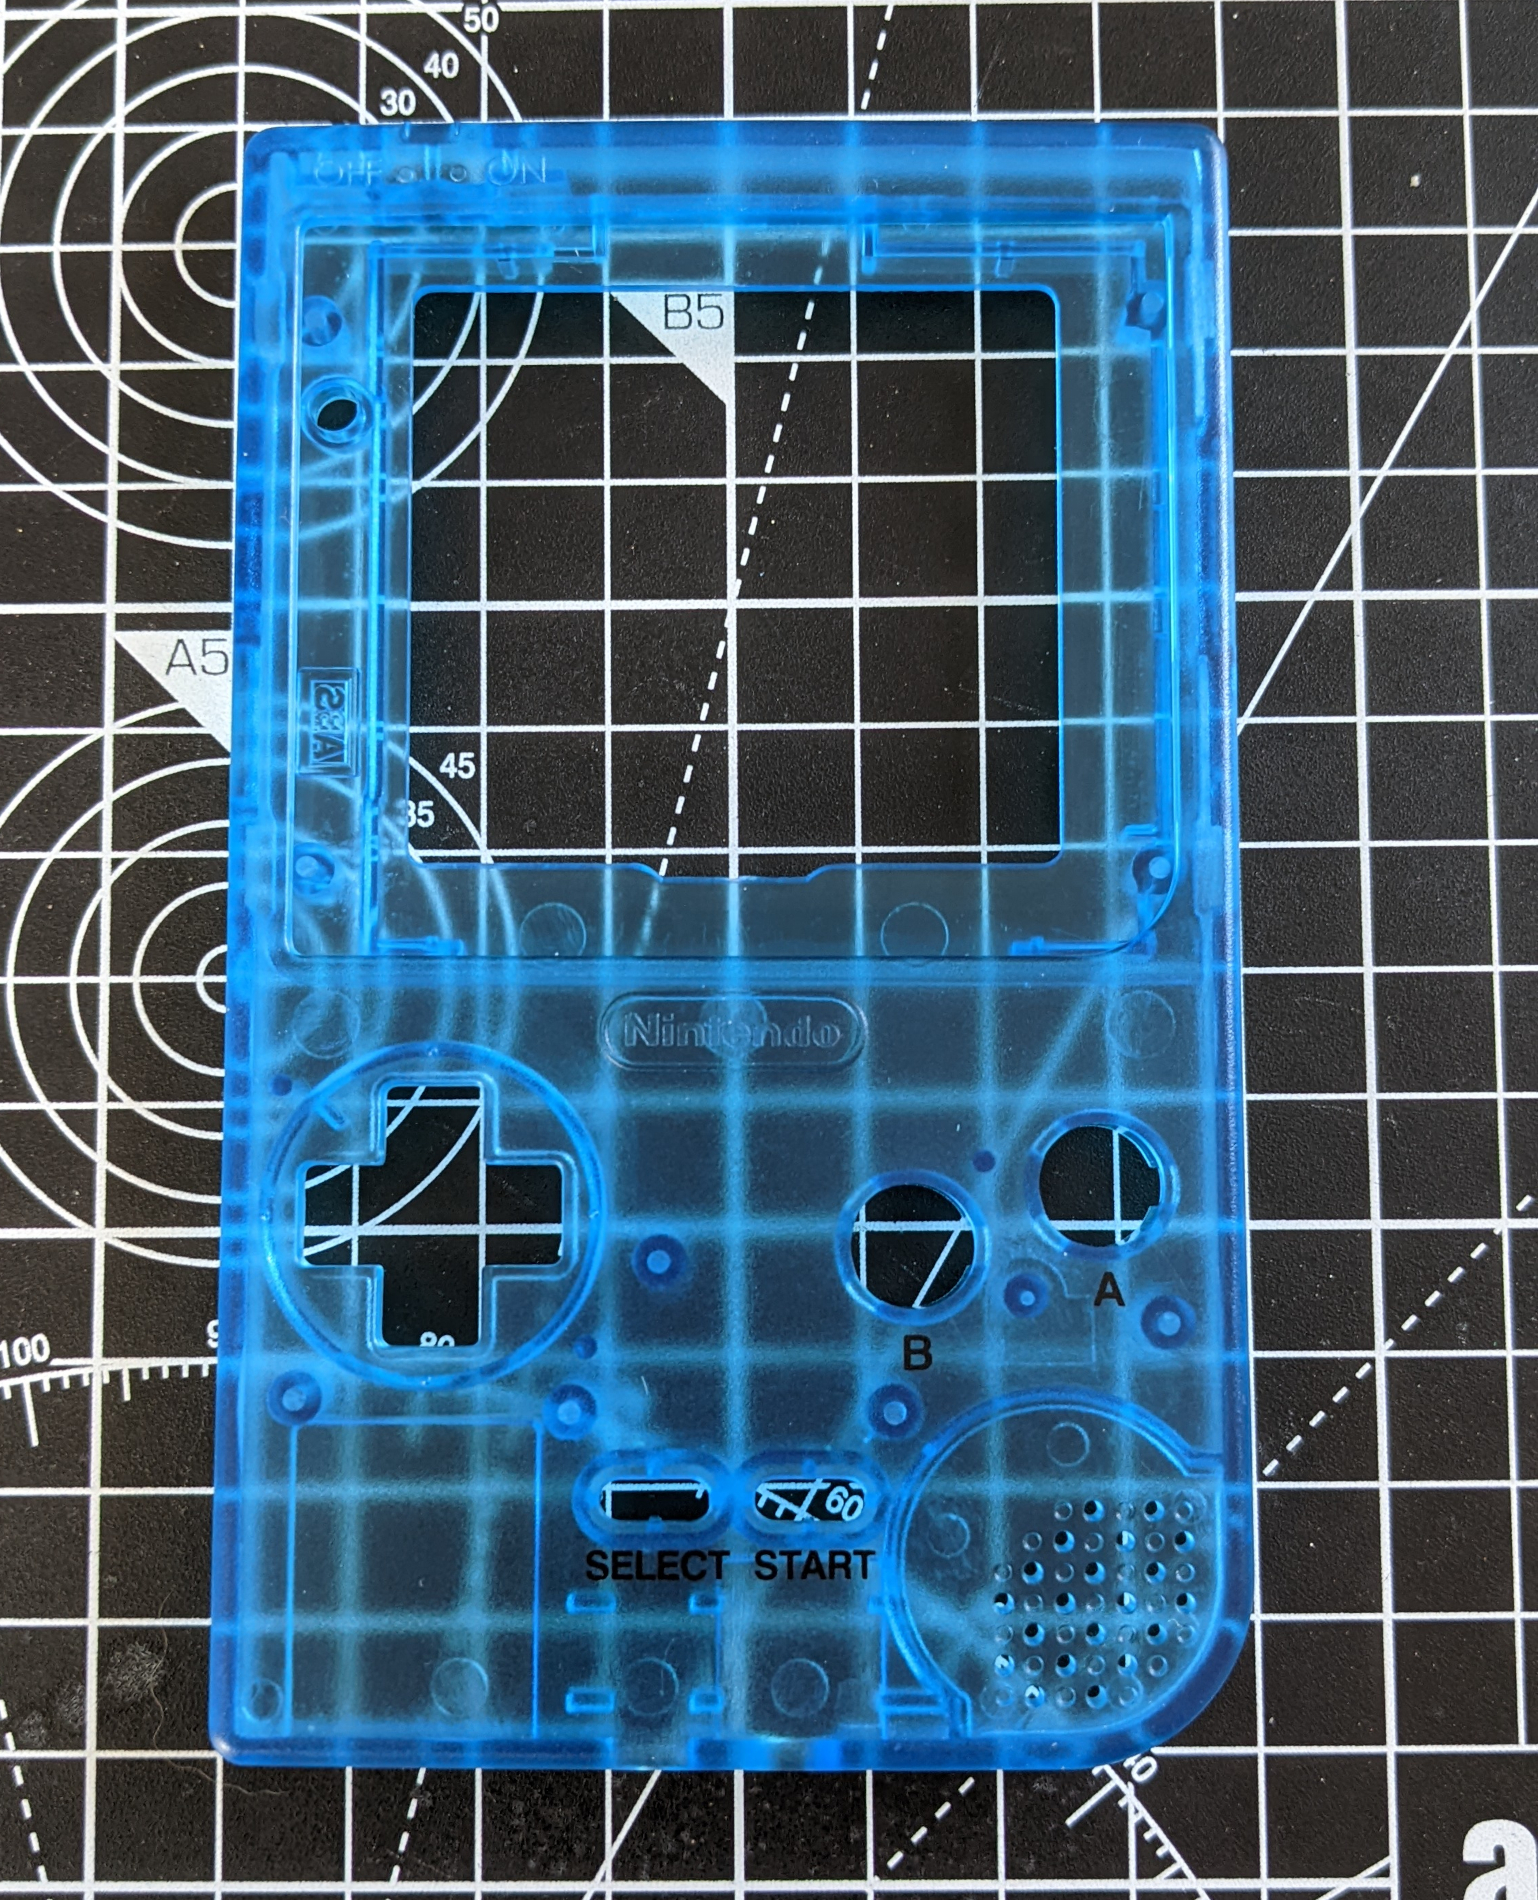
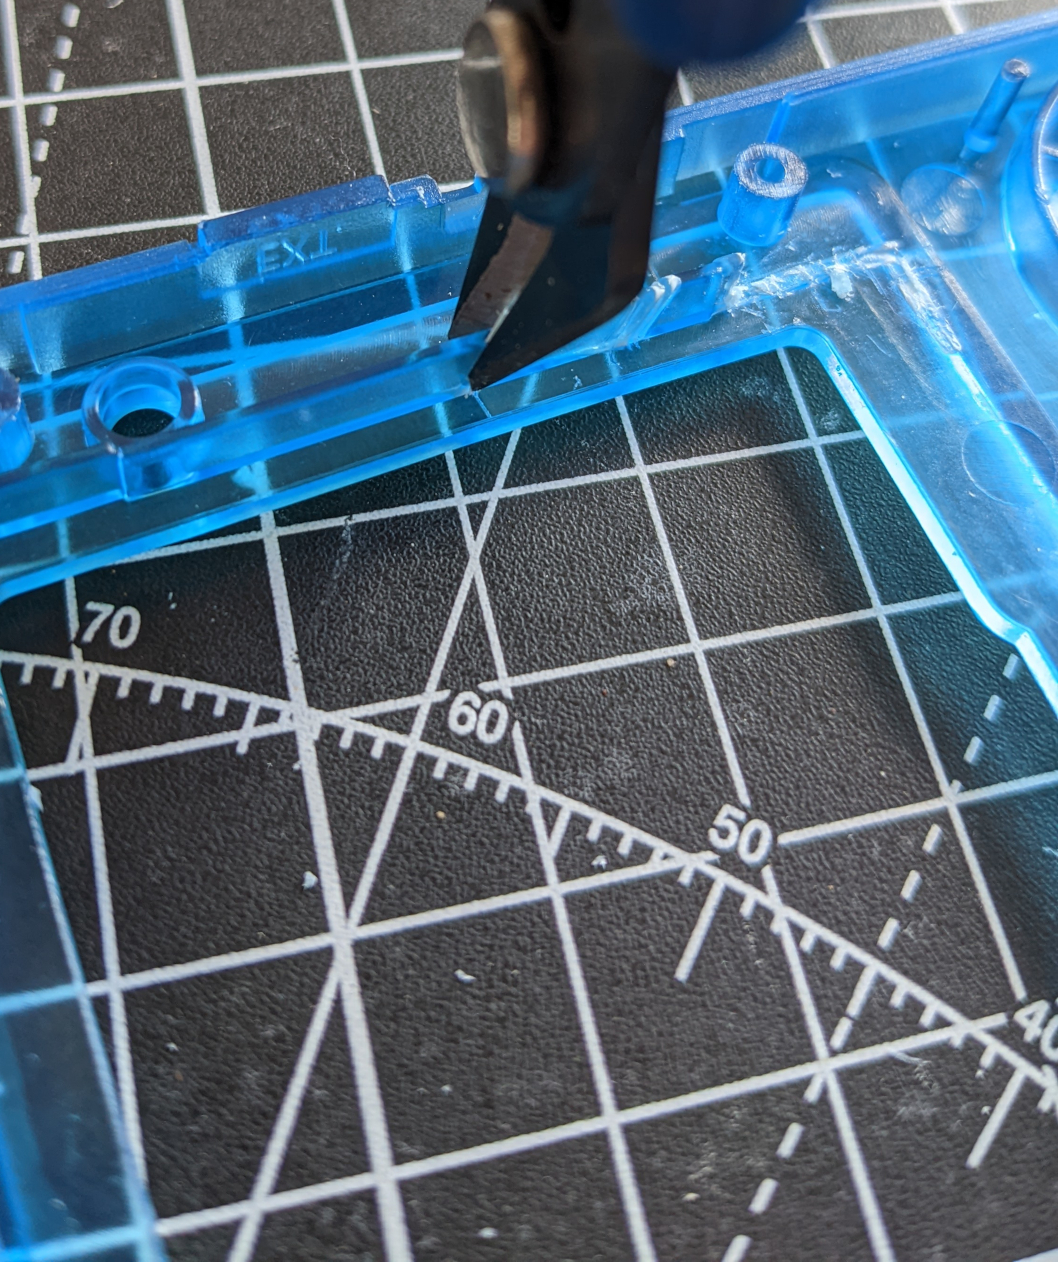
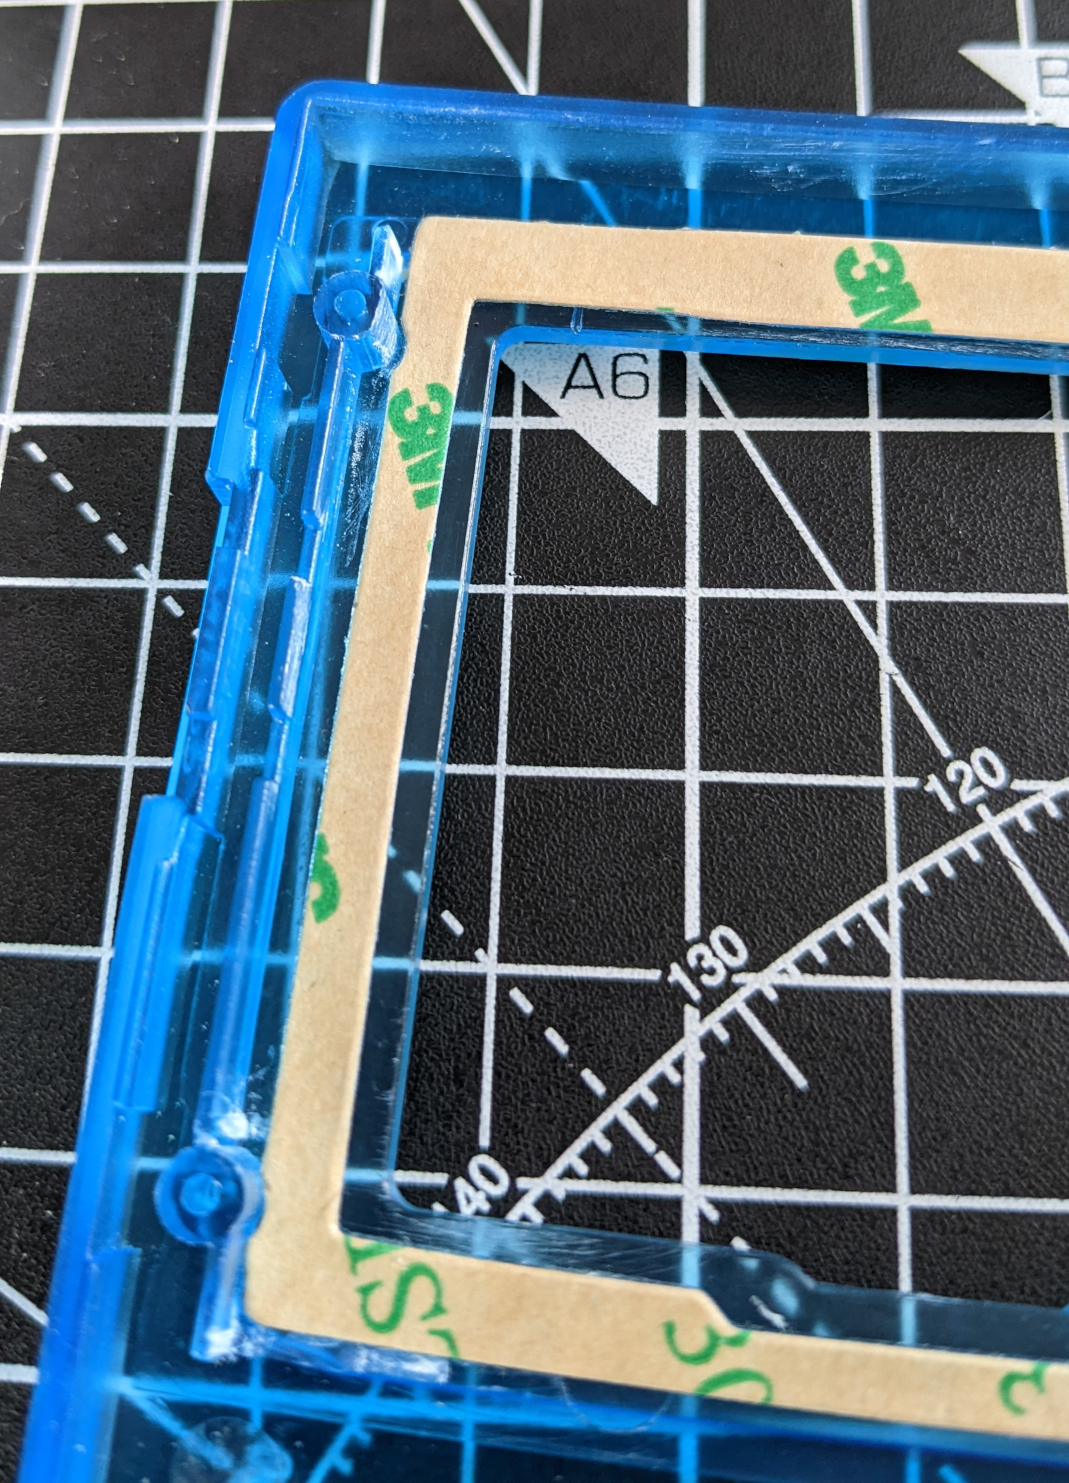
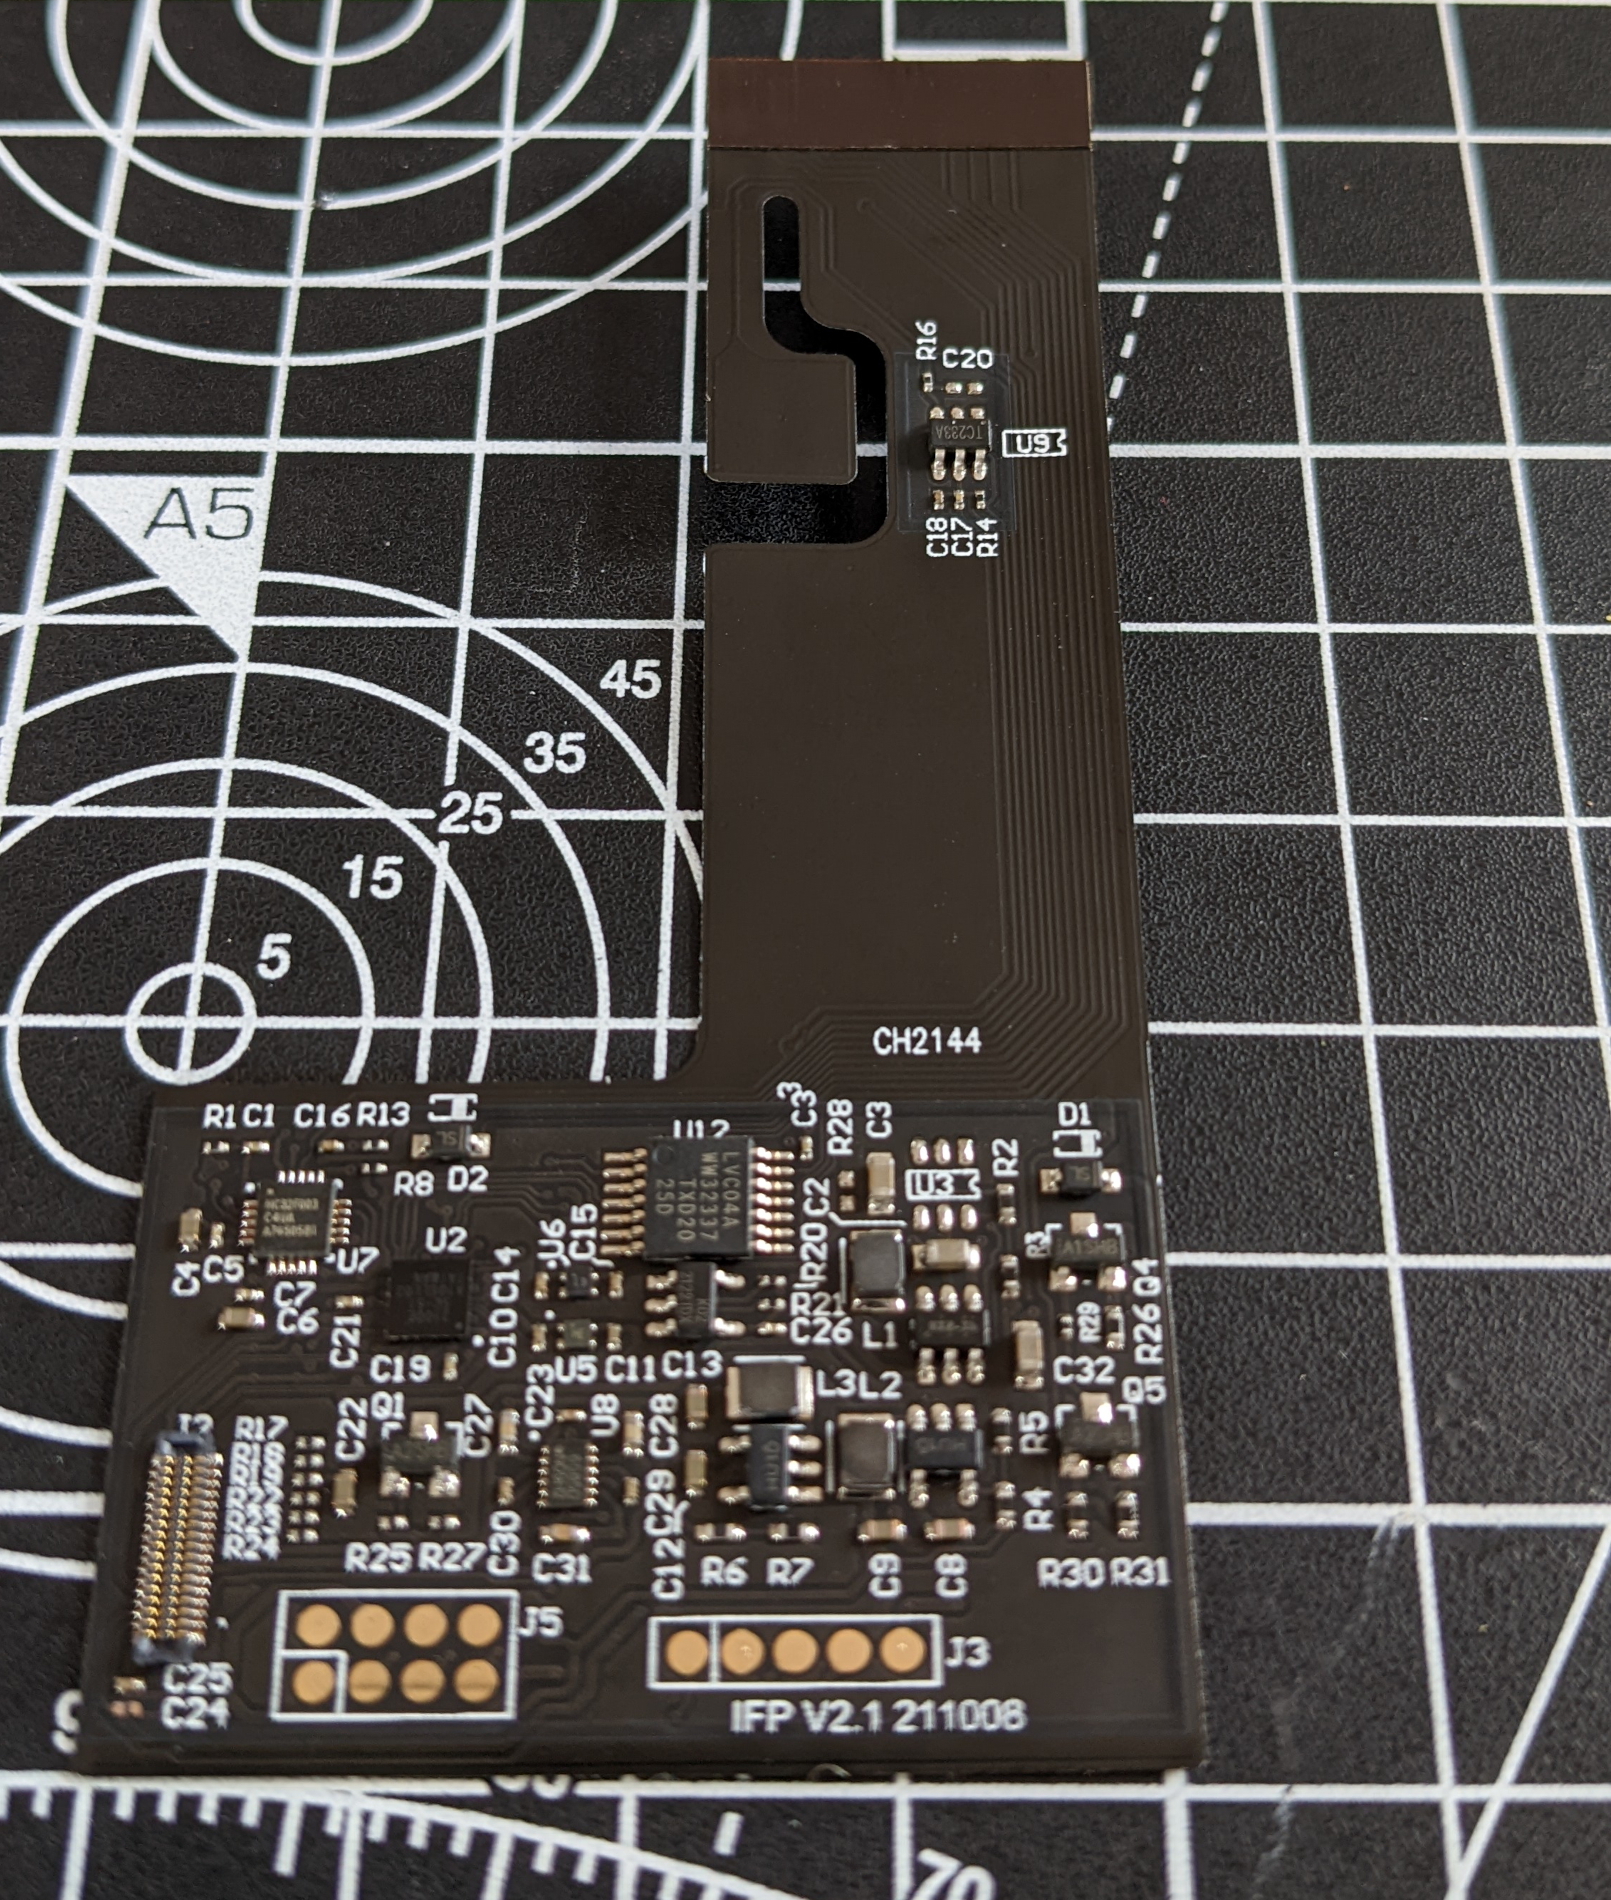
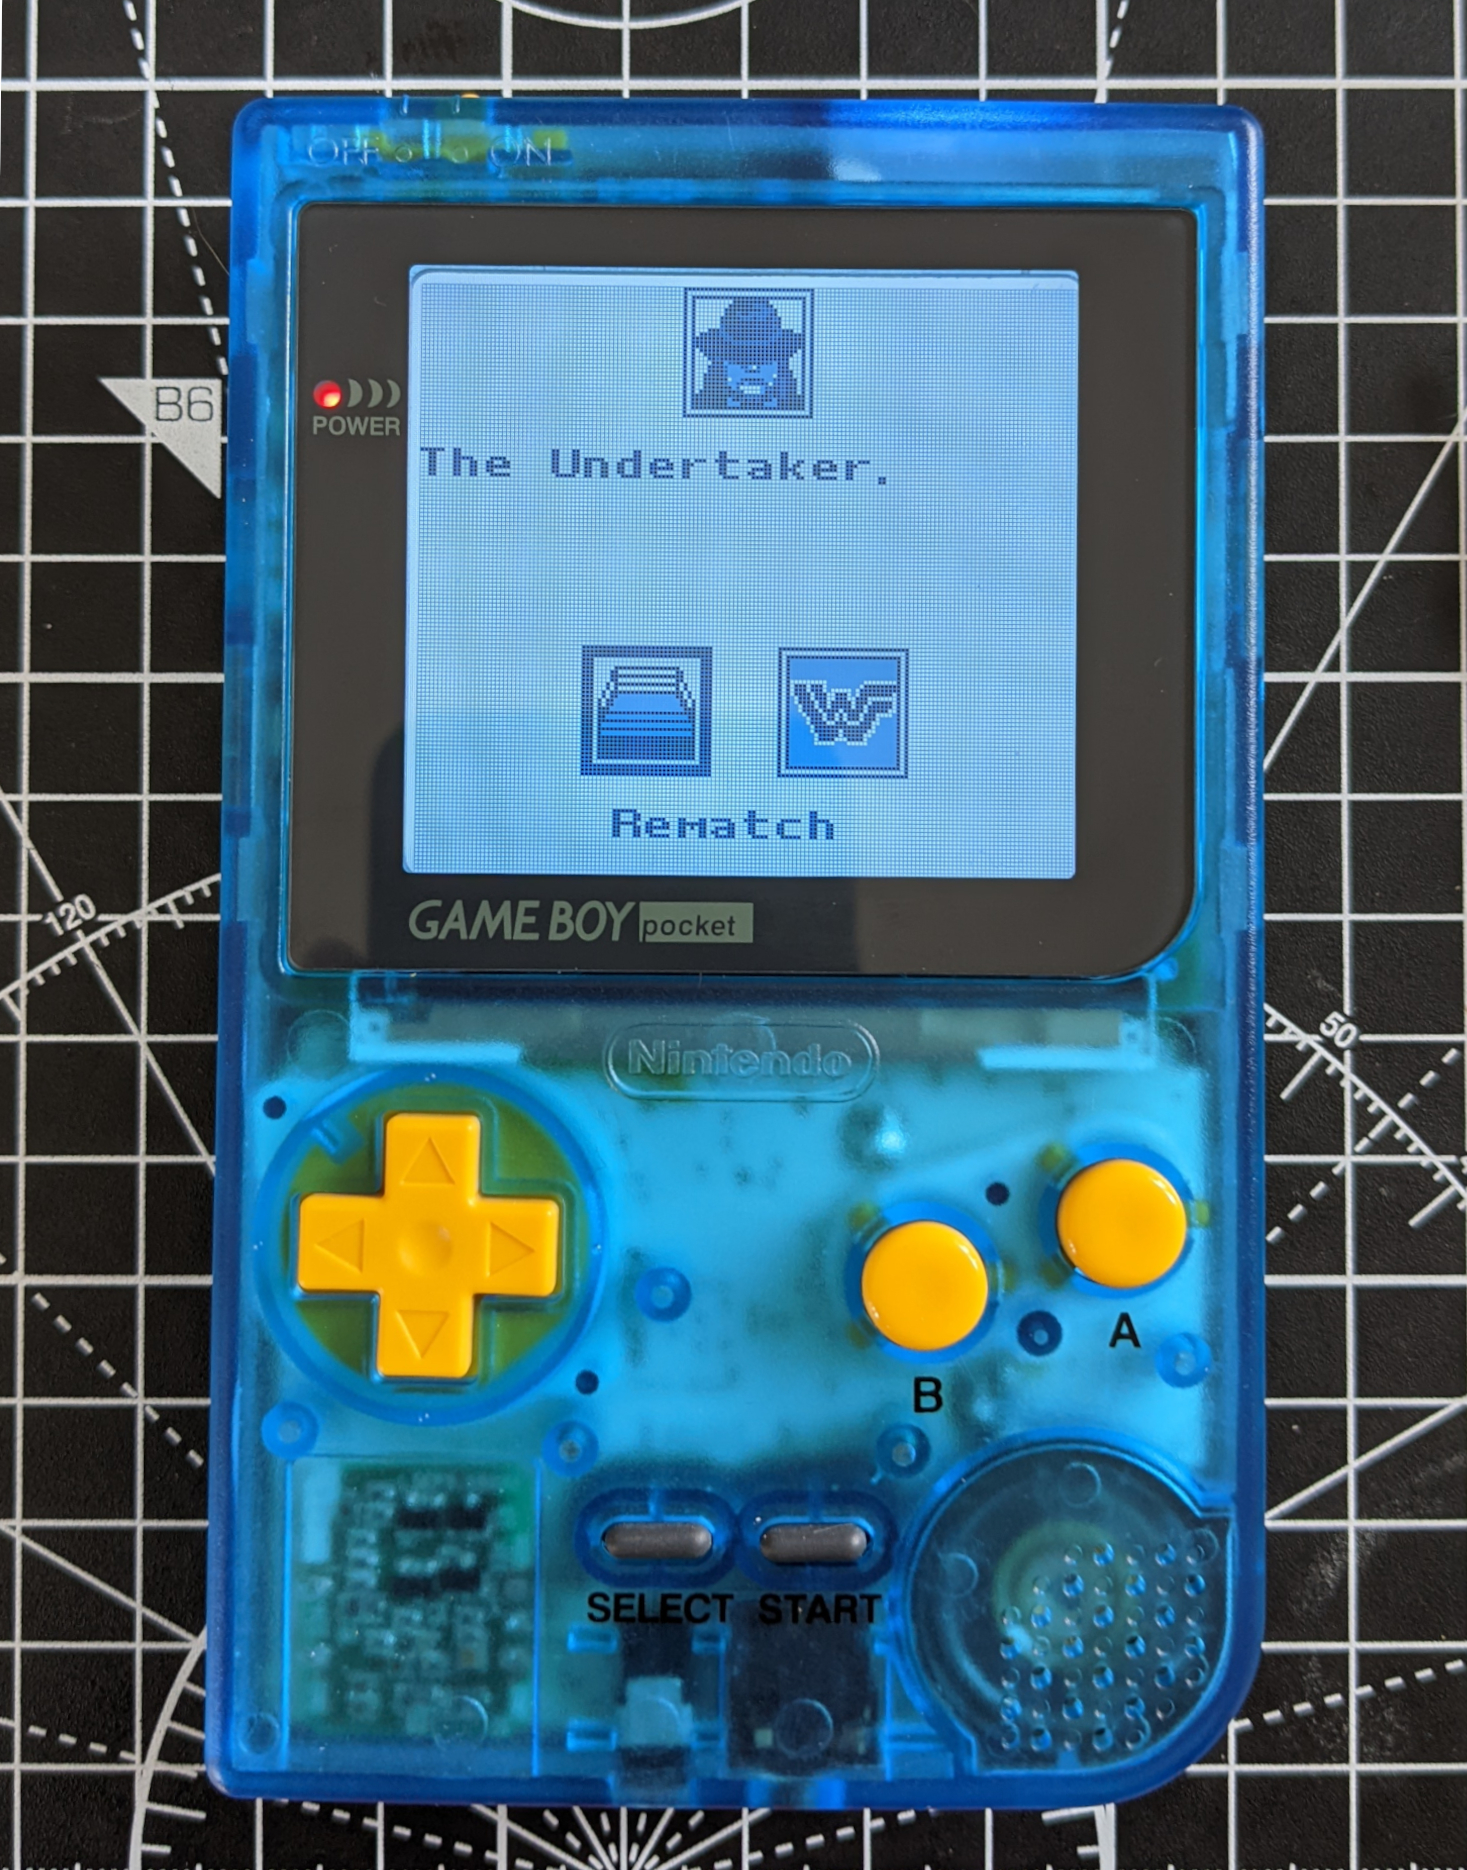
As the motherboard was drying it was time to turn on the soldering iron and prep the new shell. When I bought the shell, it looked groovy but it needed room for a fancy new screen. Nintendo are famous for cheaping out on things that will keep players on their consoles – chiefly a backlight so its down to folks like FunnyPlaying who’ve taken the initiative and somehow worked magic in making modern IPS screens – smartphone quality panels compatible with old tech.

The new screen might be thin but it’s longer than the original Game Boy screen so some snipping of the shell was needed. Trimming the shell is easy enough, just remember to sand any rough edges so you don’t bork the new screen when you fit it in and close the shell around it. The IPS screen was quite easy to install; it’s just a case of lining it up, taping it down and clicking the various tabs between the screen and included driver board. For those interested, this included a new ribbon cable where the touchpad, which is used to change colours of the screen, is now on the ribbon cable and not an additional cable that needs bolting to the set up. This leaves the cable to the power switch as the only thing to solder.
I’m not the greatest when it comes to soldering, so I live by two rules; 1. Use as much flux as possible as its best to have too much than too little and 2. Like anything in life, if you’re lubricating before carrying out a task, make sure you clean up afterwards.

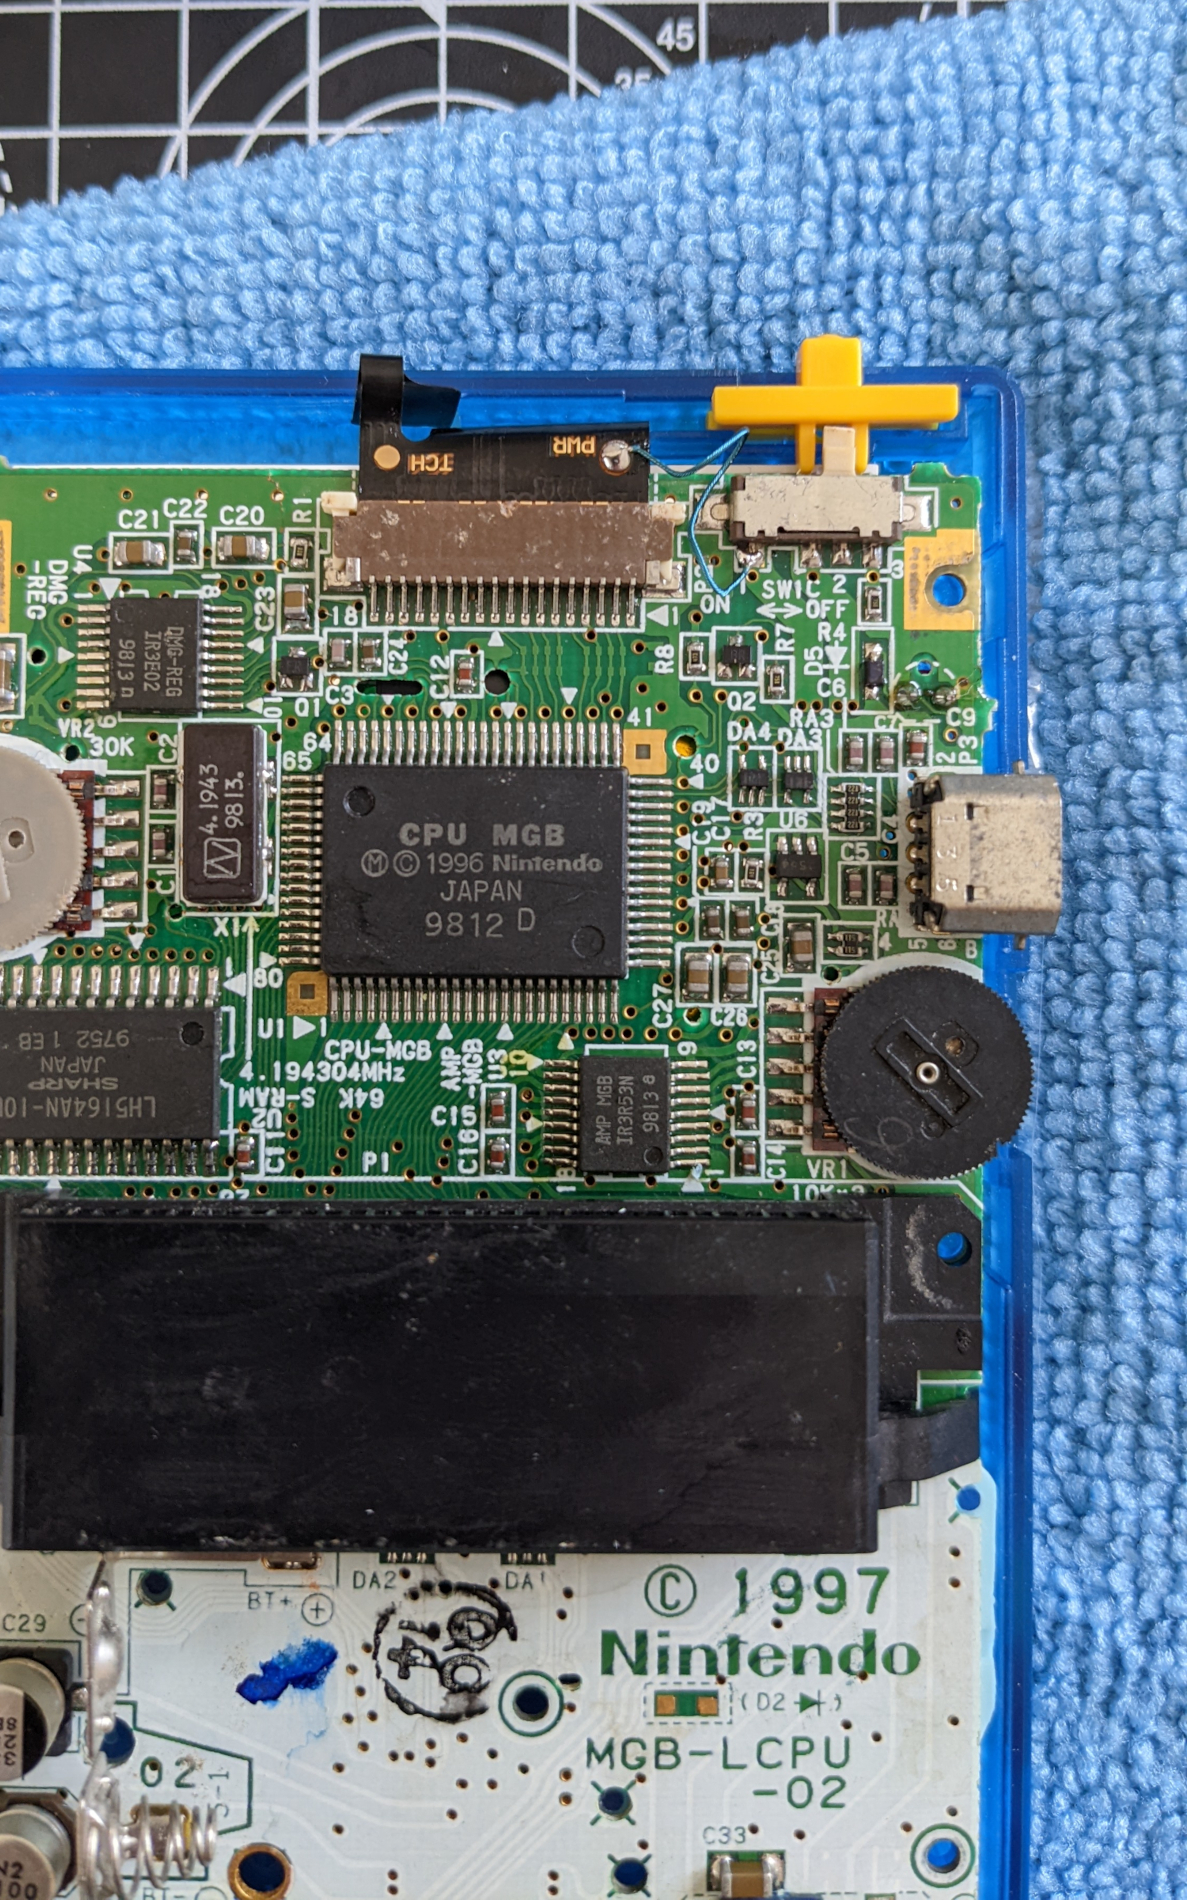
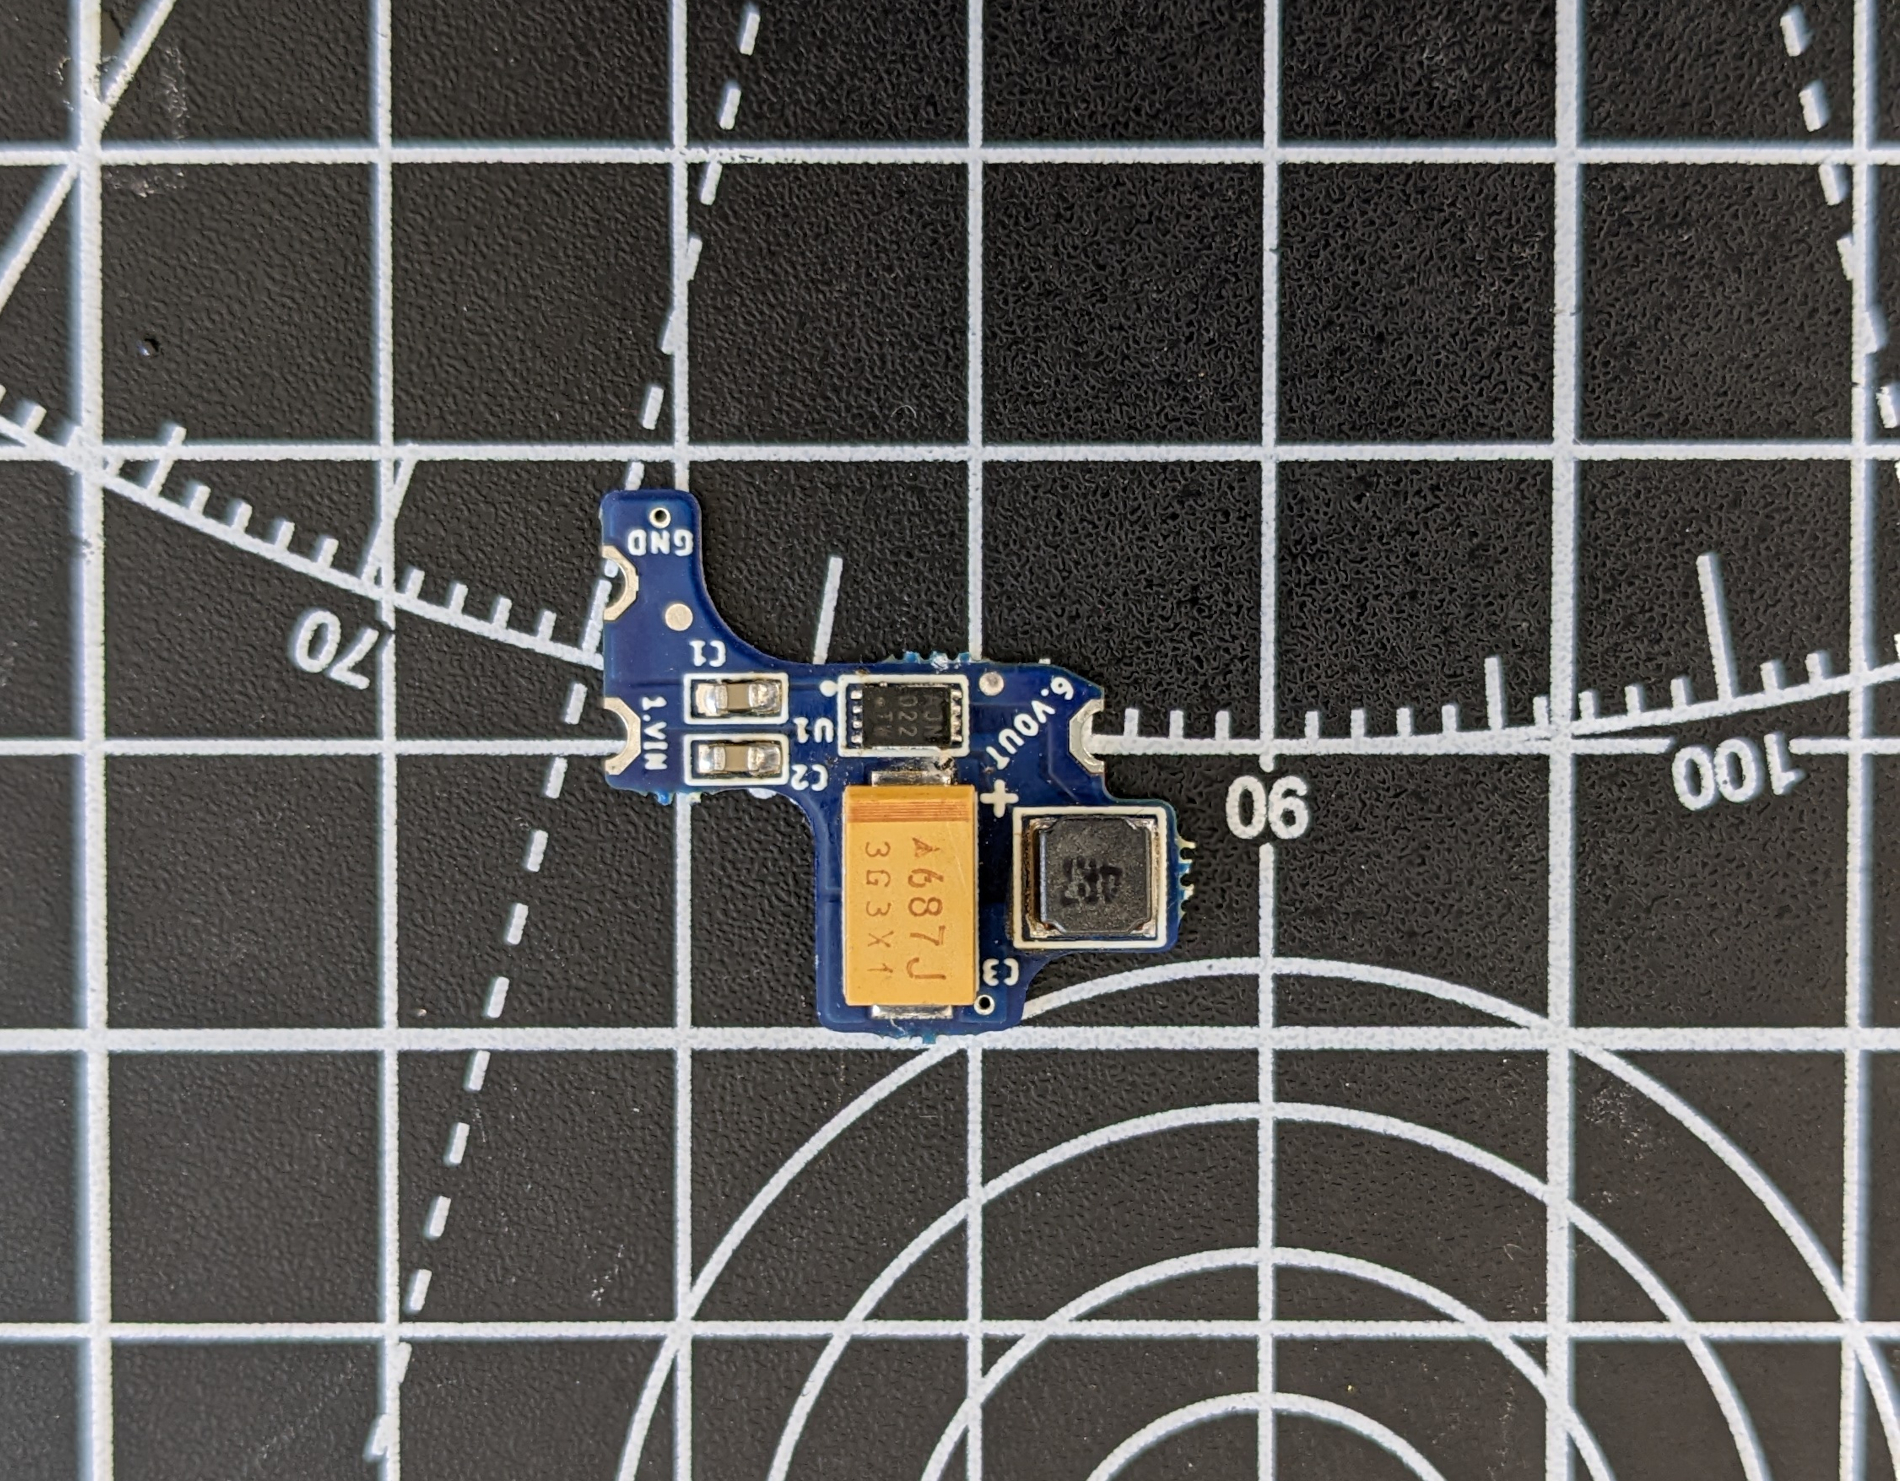
Before tacking the wires of the screen to the console, it was time for some major surgery by adding a power regulator. This is an optional mod, but recommended as it helps keep the console stable, especially when the batteries get low on power.
Following Helder’s instructions to the letter got me through this process. It was a little tricky, the process involving removing one of the pins which connect the DC power converter to the mainboard, as well as a capacitor. But once the little board was soldered into place, even after third degree burns and words that I will not repeat for fear of my mum calling me to chastise me, it was time to put everything back together.

After testing all the ports, the touchpad, and making sure everything was tickety-boo, I was happy with the results. The screen is absolutely magical – it’s bright and can change colour with the tap of a finger. The look of the console is striking and I’m really chuffed with how it turned out despite all the blisters on my fingers. I think the clear blue shell goes really well with the bright yellow buttons and considering where it started, the fact everything works as it should is amazing.
Related Posts


Follow us on…